
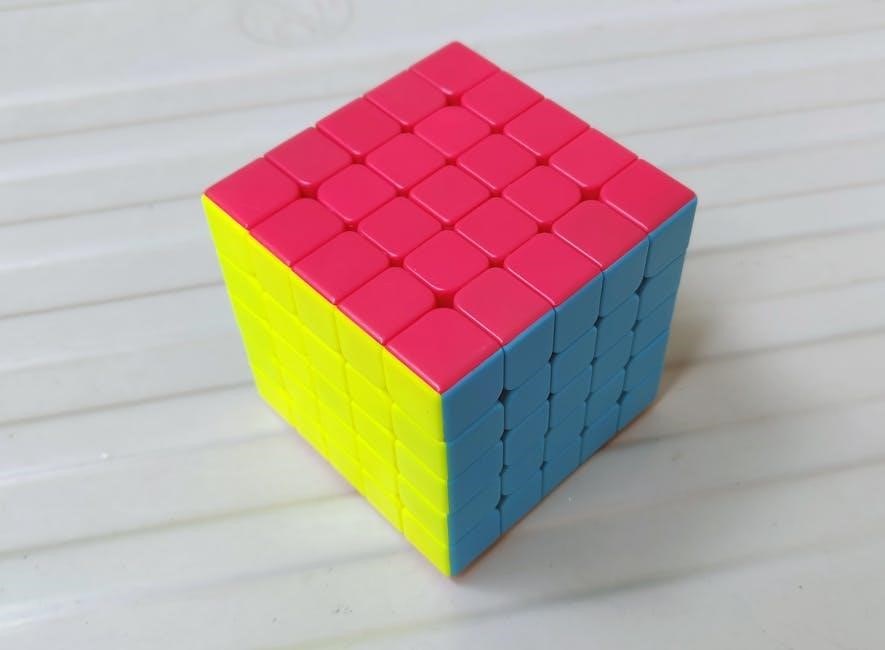
The 4×4 Rubik’s Cube, known as the Rubik’s Revenge, is the next challenge after mastering the 3×3. It consists of 24 edges, 24 centers, and 8 corners, offering a more complex puzzle. To solve it, you must first understand the basics of the 3×3 cube, as the 4×4 builds on similar concepts. The standard approach involves reducing the 4×4 to a 3×3 state by solving centers, pairing edges, and then applying 3×3 algorithms. This method simplifies the process, making it accessible to those familiar with smaller cubes.
1.1 Understanding the Rubik’s Revenge
The Rubik’s Revenge, also known as the 4x4x4 cube, is a more complex version of the classic 3×3 Rubik’s Cube. Invented by Hungarian sculptor Sebestény Péter, it consists of 24 edge pieces, 24 center pieces, and 8 corner pieces, offering over 7.4 quintillion possible permutations. Unlike the 3×3, the 4×4 has no fixed center pieces, making it more challenging. It can function as a 2×2 or 3×3 cube by restricting certain movements. The cube’s design allows for additional strategies, such as wide moves and slice notation, which are essential for solving. Understanding its mechanics and unique features is crucial before diving into advanced solving techniques.
1.2 Importance of Knowing 3×3 Cube Basics
Mastery of the 3×3 Rubik’s Cube is a prerequisite for tackling the 4×4 version. The 3×3 teaches fundamental concepts like notation, layer-by-layer solving, and essential algorithms, which are crucial for understanding the 4×4. Without a solid grasp of the 3×3, the additional complexity of the 4×4, such as wide moves and slice notation, can be overwhelming. The 3×3 skills also provide the muscle memory needed to execute the precise movements required for the larger cube. Additionally, the final stages of solving the 4×4 rely heavily on 3×3 techniques, such as orienting the last layer and correcting parity issues. Thus, proficiency in the 3×3 is the cornerstone of successfully solving the 4×4 Rubik’s Cube.
Notation and Basic Concepts
The Rubik’s Revenge introduces unique notation and concepts. A standard 4×4 notation includes letters like U, D, L, R, F, B for face turns, while slice moves use ‘w’ (wide) and ‘s’ for inner layers. Understanding these is essential for mastering the cube’s mechanics and solving algorithms.
2.1 Standard Notation for 4×4 Cube
The standard notation for a 4×4 Rubik’s Cube builds on the 3×3 system but includes additional terms for the extra layers. Face turns are denoted by U, D, L, R, F, and B, similar to the 3×3, representing Up, Down, Left, Right, Front, and Back, respectively. These letters indicate clockwise turns of the outer layers. Slice moves, which affect inner layers without moving the outer ones, use notations like E (equatorial slice) and S (vertical slice). Inner layer turns are denoted by lowercase letters, such as u for the inner Up layer. This notation is crucial for communicating moves and algorithms effectively, allowing solvers to distinguish between face turns and slice moves. It provides clarity in solving methods, especially when dealing with complex steps like pairing edges or solving centers. Understanding this notation is essential for mastering 4×4 algorithms and techniques.
2.2 Wide Moves and Slice Notation
Wide moves and slice notation are essential for solving the 4×4 Rubik’s Cube. A wide move involves turning two adjacent faces simultaneously, indicated by a lowercase letter followed by a “w,” such as “Rw” for a right slice. These moves affect both the outer layer and the inner slice. Slice moves, like E (equatorial) and S (vertical), rotate middle layers without disturbing the outer ones. The notation helps differentiate between face turns and slice moves, crucial for advanced solving techniques. For example, “Fw” denotes a front slice move, while “Uw” affects the top and middle layers. This system ensures clarity and precision, enabling solvers to execute complex algorithms and efficiently reduce the cube to a 3×3 state. Understanding these notations is vital for mastering the 4×4 solving process.

Step-by-Step Solving Process
The 4×4 Rubik’s Cube is solved by first forming the centers, then pairing the edges, and finally reducing it to a 3×3 cube. This modular approach simplifies the process, allowing solvers to use familiar 3×3 techniques once the cube is reduced.
3.1 Solving the Centers
Solving the centers is the first step in mastering the 4×4 Rubik’s Cube. Unlike the 3×3, the 4×4 does not have fixed center pieces, so you must form them manually. Start by holding the cube in a way that allows you to focus on one face at a time. Identify the stickers of the same color and work on aligning them to create coherent center blocks. A common strategy is to solve two opposite centers first, such as white and yellow, and then proceed to the remaining ones. Use the outer layers to maneuver pieces into place without disrupting the centers you’ve already formed. Once all four centers are solved, the cube will begin to take shape, setting the stage for pairing edges and reducing it to a 3×3-like state. This step requires patience and careful manipulation to ensure accuracy. You can refer to PDF guides for detailed diagrams and step-by-step instructions to help you master this fundamental part of the process.
3.2 Pairing the Edges
After solving the centers, the next step is pairing the edges. This involves aligning edge pieces to form 2×1 blocks, which are essential for reducing the 4×4 cube to a 3×3-like state. To achieve this, focus on one pair at a time, ensuring they match in color and orientation. Use the outer layers to maneuver edge pieces into place without disturbing the solved centers. A common technique is to hold the cube so that the paired edges are on the bottom and front faces, allowing easy access to the remaining edges. Once all edges are paired, the cube will resemble a standard 3×3, making it easier to apply familiar algorithms. For visual learners, PDF guides often include diagrams illustrating these pairings, providing a clear roadmap for success. Patience and precision are key during this phase, as improper alignment can complicate later steps.
3.3 Reducing to a 3×3 Cube
Once the centers are solved and edges are paired, the next step is to reduce the 4×4 cube to a 3×3 state. This involves treating the paired edges as single edges and ignoring the inner slices. Hold the cube so that the paired edges are on the bottom and front faces, allowing you to use standard 3×3 algorithms. Focus on aligning the remaining edge pairs and corner pieces to match their respective centers. As you progress, the cube will begin to resemble a 3×3, with only the outer layers needing attention. PDF guides often include detailed diagrams to help visualize this transformation, ensuring a smooth transition to the final solving phase. This step requires careful manipulation to maintain the paired edges while solving the remaining pieces.
Advanced Techniques and Algorithms
Mastery of the 4×4 cube requires advanced techniques like parity fixes and optimized algorithms. Learn the Yau Method for faster solving and understand wide moves for efficiency.
4.1 Parity Fixes and Special Cases
Parity issues are common in 4×4 solving, requiring specific algorithms to correct. These include edge and corner parity, which can arise during the reduction process. Special cases like swapped edges or corners demand precise fixes. Understanding these scenarios ensures a smooth transition to the final 3×3 stage. Utilize commutators or standard parity algorithms to resolve these issues efficiently. PDF guides often detail these fixes, providing step-by-step solutions for quick reference. Regular practice helps in identifying and addressing these cases without disrupting the overall solve flow. Mastering parity fixes is essential for achieving consistent success in solving the 4×4 Rubik’s Cube.
4.2 Optimizing Solve Times
Optimizing solve times for the 4×4 Rubik’s Cube requires mastering fundamental algorithms and improving efficiency. Focus on reducing unnecessary moves and developing muscle memory through consistent practice. Advanced techniques, such as lookahead and edge-corner pairing, can significantly speed up your solves. Utilize PDF guides and tutorials from experienced solvers to learn optimized algorithms and strategies. Regularly review and refine your solving process to identify bottlenecks and improve overall flow. Incorporate speed-solving tips, such as minimizing piece movements and focusing on efficient transitions between steps. With dedication and practice, you can achieve faster solve times while maintaining accuracy and control over the cube.
Mastery of the 4×4 Rubik’s Cube requires patience and practice. Additional resources, including PDF guides and tutorials, provide detailed algorithms and tips to enhance your solving skills.

5.1 Final Tips for Mastery
Consistent practice is key to mastering the 4×4 Rubik’s Cube. Start with shorter sessions and gradually increase duration as you build confidence. Utilize online resources, such as PDF guides, to refine your techniques. Focus on understanding the Yau Method, which simplifies the solving process. Stay patient with parity issues and special cases, as they require additional algorithms. Regularly review your progress and identify areas for improvement. Join online communities or forums to connect with other cubers for tips and motivation. Lastly, embrace persistence—mastery takes time, but dedication will lead to success. Keep practicing, and soon you’ll solve the 4×4 with ease!
5.2 Recommended PDF Guides and Tutorials
Several excellent PDF guides are available to help you master the 4×4 Rubik’s Cube. Feliks Zemdegs’ 4×4 Solution Guide is highly recommended, offering detailed step-by-step instructions. Another great resource is the Print Friendly PDF Guide by CubeSkills, which includes comprehensive diagrams. These guides cover the reduction method, Yau Method, and essential algorithms for solving the cube. They also address common challenges like parity and edge pairing. Download these PDFs to follow structured lessons, complete with visual aids and practice exercises. Whether you’re a beginner or advanced solver, these resources provide clear, concise instructions to improve your skills. Visit the CubeSkills website or Rubik’s official resources to access these guides and start your journey to mastery.


Leave a Reply
You must be logged in to post a comment.